


HDS7105_V2021 control software tutorial
HDS7105_V2021 control software tutorial
The seitcher supports docking software control, software operation panel and switcher key panel are used correspondingly.( The software can be downloaded from Devicewell official website)

Click “SCANNING” to search for the corresponding device, as shown in the figure below:

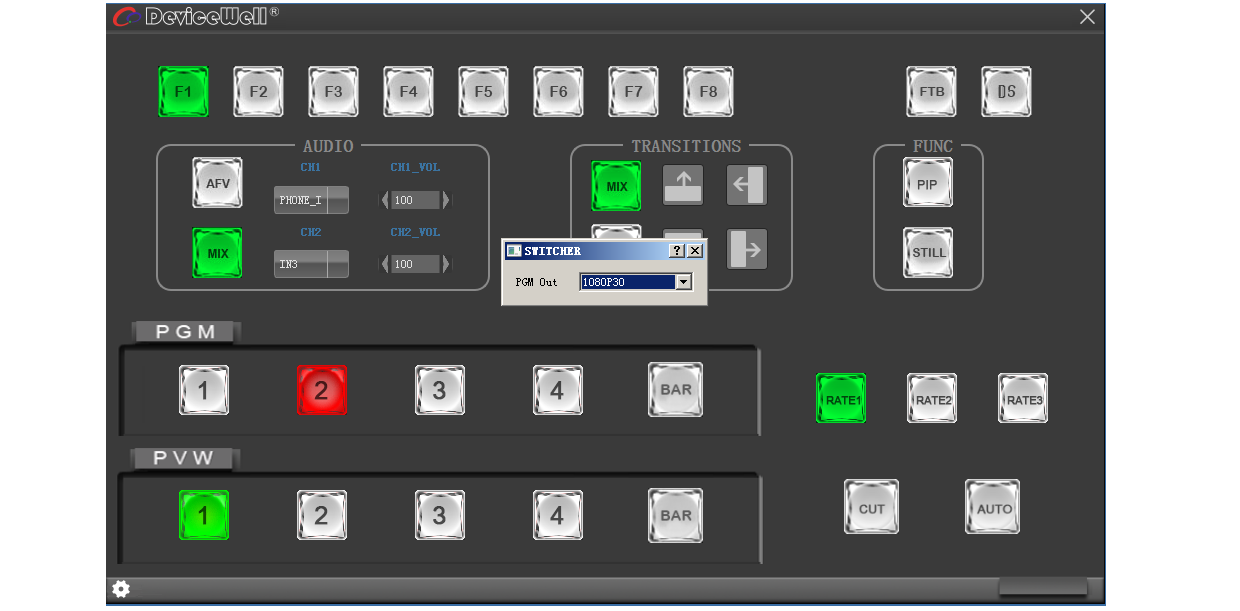
(1) After searching for the device, you can perform the following operations on the switcher: function area, black field control area, audio control area, transition effect control area, comprehensive control area, PGM and PVW selection area, and transition control area. Settings. As shown below:

- Functional area
F1 --- Resolution control
After clicking F1 on the key panel, you can adjust the resolution of the screen output. Each time you press the button, you can adjust the output resolution. The resolution is 1080P60Hz / 1080P50Hz / 1080P30Hz / 1080P25Hz / 1080P24Hz / 1080I60Hz / 1080I50Hz. Select as shown below
- Black field control area
FTB --- Black field control area
During the live broadcast, if you encounter an unexpected situation, you can press the FTB black button. At this time, the PGM live screen will output a black screen. The FTB in the software control panel will display a red light flashing. Press the FTB again to cancel the black setting. As shown below

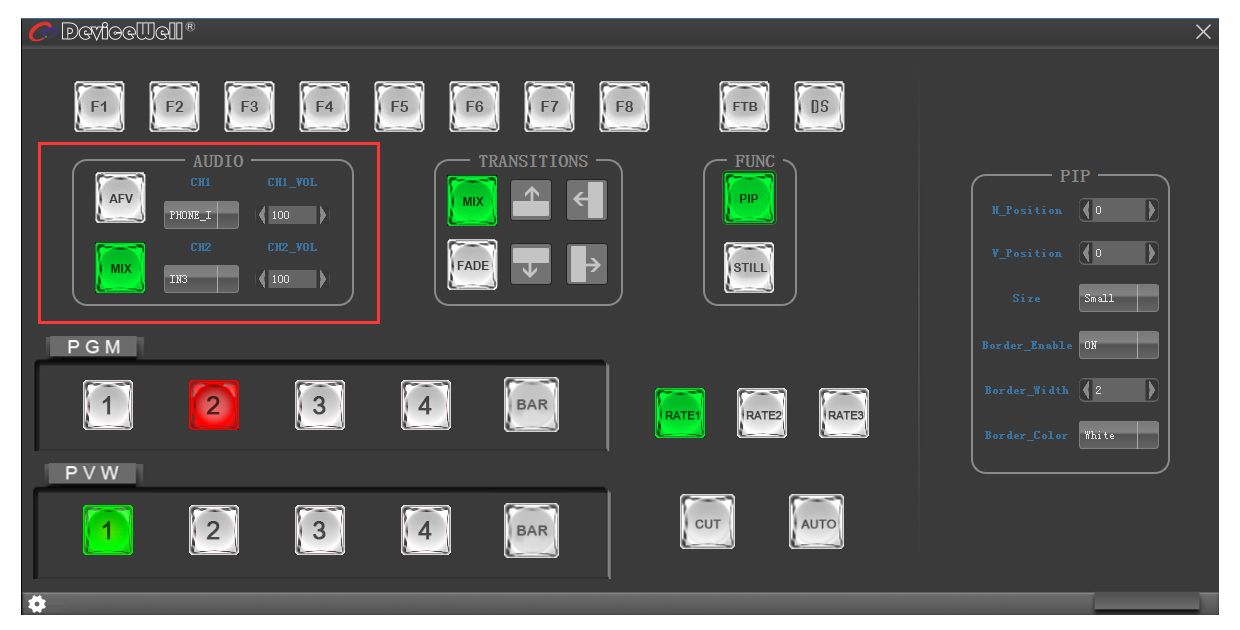
- Audio control area (default is AFV follow mode)
(A) AFV follow mode
Press AFV follow mode (green light is displayed). The channels of audio follow mode are IN1-HDMI1, IN2-HDMI 2, IN3- HDMI3, IN4-HDMI4. By default, it follows the audio of PGM live channel. At this time, you can only adjust the audio volume. Size, you need to increase or decrease the volume. You can set the volume from 0 to 100 through the slider. As shown below
-
MIX mixing mode
Press the MIX mixing mode (green light is displayed) to support the two-channel mixing mode. The assigned channels for the mix are IN1-HDMI1, IN2-HDMI 2, IN3- HDMI3, IN4- HDMI4, PHONE_IN, MIC_IN1, MIC_IN2, which can be accessed through Press CH1 and CH2 on the control panel to select the audio channel. If you need to increase or decrease the volume, you can set the volume from 0 to 100 through the slider. As shown below
- Transition effect control area
In the transition effect control area, you can press MIX (mixed transition), FADE (fade in and fade out transition) and up, down, left, right, up and down to six special effect transition settings. As shown below

In the transition control area, you can set the transition rate. Press RATE1, RATE2, and RATE3 on the panel to control the transition rate definition. It's effective only when playing.
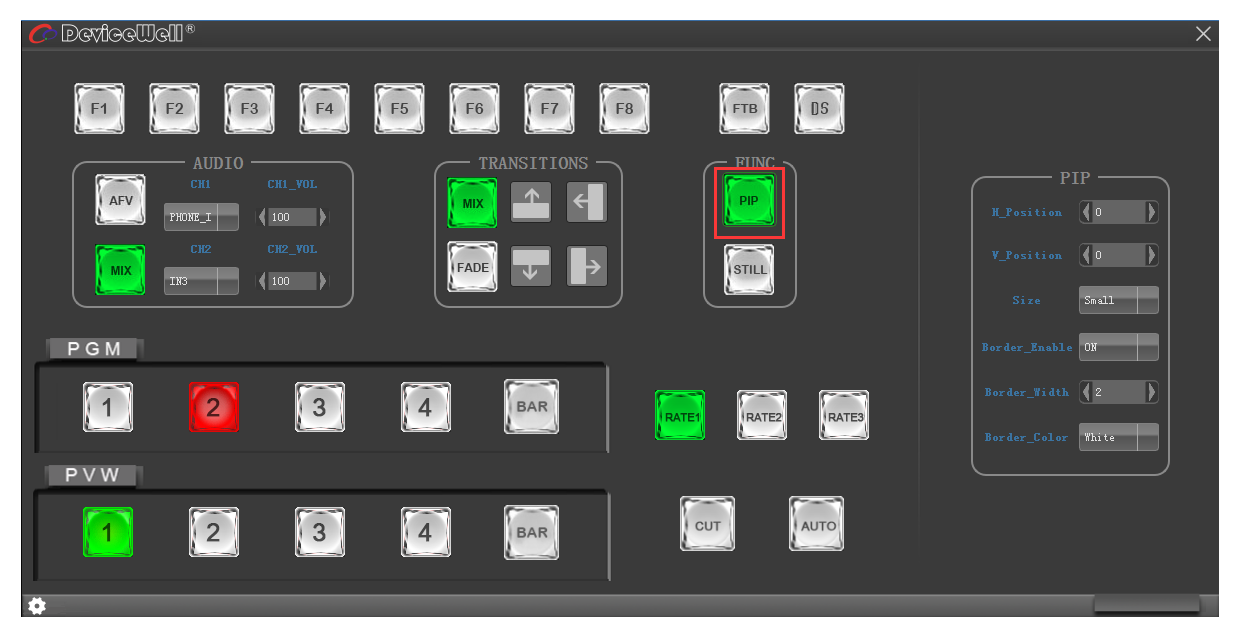
- Integrated control area
(I) PIP Picture-in-Picture Settings
Press PIP (display green light) in the software control panel to enter picture-in-picture settings. At this time, you can set the horizontal position, vertical position, display size, border switch, border width, and border color of the screen. As shown below
-
STILL screen freeze setting
Press STILL (display green light) in the software control panel to enter the picture freeze setting. At this time, you can freeze the live output picture. Click STILL again to cancel the freeze effect. As shown below

- PGM and PVW selection area
PGM and PVW are preview output and live broadcast output respectively. You can switch the input source of the console by clicking the buttons 1-4 on the software control panel. Where BAR is the color bar output. As shown below

Note: If the switcher is operated on the device side, the PC-side interface cannot be displayed synchronously. You must click the synchronization button to control the interface to display synchronously:
Software data download